
A flashing blue light on your robot mower’s charging station signals the need to locate a wire break. Your Automower® might display the “No loop signal” error because of a break in your Boundary Wires system.
You can find these breaks using two proven methods. The first involves a systematic manual search by splitting your boundary wire into sections. The second method uses a specialized loop wire break detector tool that works faster. Manual searching gets the job done, but takes longer, particularly with underground wires that you can’t see.
Let me walk you through both approaches step by step in this piece. You’ll learn which method suits your situation best and how to repair the damaged section once you find it. Your robot mower will be back to cutting grass soon, regardless of whether natural wear, corrosion, or garden changes caused the break.
How to identify broken boundary wires
Understanding how to identify a boundary wire break is significant before you start repairs. Your robot mower’s boundary system failure shows several clear indicators.
Watch for ‘No loop signal’ error
Your mower’s screen or companion app displays the “No loop signal” error message as the most common boundary wire problem indicator. The mower cannot detect the boundary wire signal when this error appears. Different mower models display varying messages. Ambrogios shows “No Signal” directly on the mower. Husqvarna models display the message through their Automower Connect app. The missing or disrupted signal doesn’t always mean a broken wire at first.
Check the charging station’s flashing blue light
The charging station’s LED indicator helps diagnose problems effectively. A flashing blue light signals boundary wire issues clearly. Husqvarna Automower’s models 105, 305, 308, 310, 315, 315X, 405X, 415X, 420, 430X, 440, and 450X show this blinking blue light that indicates potential breaks. Older models like Automower G2, 220AC, 230ACX, Solar Hybrid, 260ACX, and 265ACX display a blinking green light instead. Robomow’s indicator shows a fast red flash for broken connections and a slow red flash signals weak connections.
Look at visible wire connections and splices
These error signals suggest you should check the physical connections first. Your inspection should verify that:
- The charging station terminals connect to the boundary wire properly
- The connectors remain tight without damage or corrosion
- All known wire splices stay intact with proper connections
Wire breaks occur most often at the joints, making them your main inspection points. Take a walk around your lawn’s perimeter to spot visible wire damage, disturbed soil, or signs of landscaping work that might have cut the wire. Finding these issues becomes harder if you’ve buried the boundary wire underground.
The “No loop signal” errors might appear if your mower runs in ECO mode, so check this setting before assuming a wire break.
Manual method to find the wire break
A systematic approach to finding wire breaks manually can save you money on specialized tools. This method proves reliable for most boundary wire breaks. The process needs patience and attention to detail.
Turn off ECO mode on the mower
Your manual search won’t work with active ECO mode on the robot mower. The loop signal deactivates when ECO mode runs and the mower isn’t operating. This disrupts boundary wire circuit testing. Here’s how you disable it:
- Place your mower in the charging station
- Access settings through the Automower Connect app or mower display
- Look for Settings > ECO mode
- Untick the box or toggle it off
The charging station should display a constant light instead of a flashing green light that signals active ECO mode.
Switch guide and boundary wire connectors
A clever technique helps determine which boundary section has the break by swapping connections between your guide wire and boundary wire at the charging station:
- Disconnect the guide wire (G1) and one boundary wire (AL) from the charging station
- Connect the guide wire to the boundary wire terminal (AL)
- Connect the boundary wire to the guide wire terminal (G1)
The break lies between the guide wire connection point and the disconnected boundary wire section if the indicator lamp changes from flashing blue to solid green. This narrows your search area to about half your installation.
Use a new loop wire to isolate the break

You’ll need these items:
- A new piece of loop wire
- Automower connectors and couplers
- Wire cutting tools and pliers
Start by disconnecting the suspected broken wire section from the charging station. Connect your new loop wire’s end to an available terminal. Cut the suspected broken section’s middle point and connect your new loop wire to the end that links to the charging station.
Repeat the process to narrow down the break location
Keep dividing the suspected section in half until you find a small area with the break. Each time you check:
- Watch if the charging station indicator turns green
- Move to a different section if it stays blue
- You’ve found the good wire half if it turns green
Your search area shrinks with each iteration until you pinpoint the exact break location. After finding it, you can repair the wire properly.
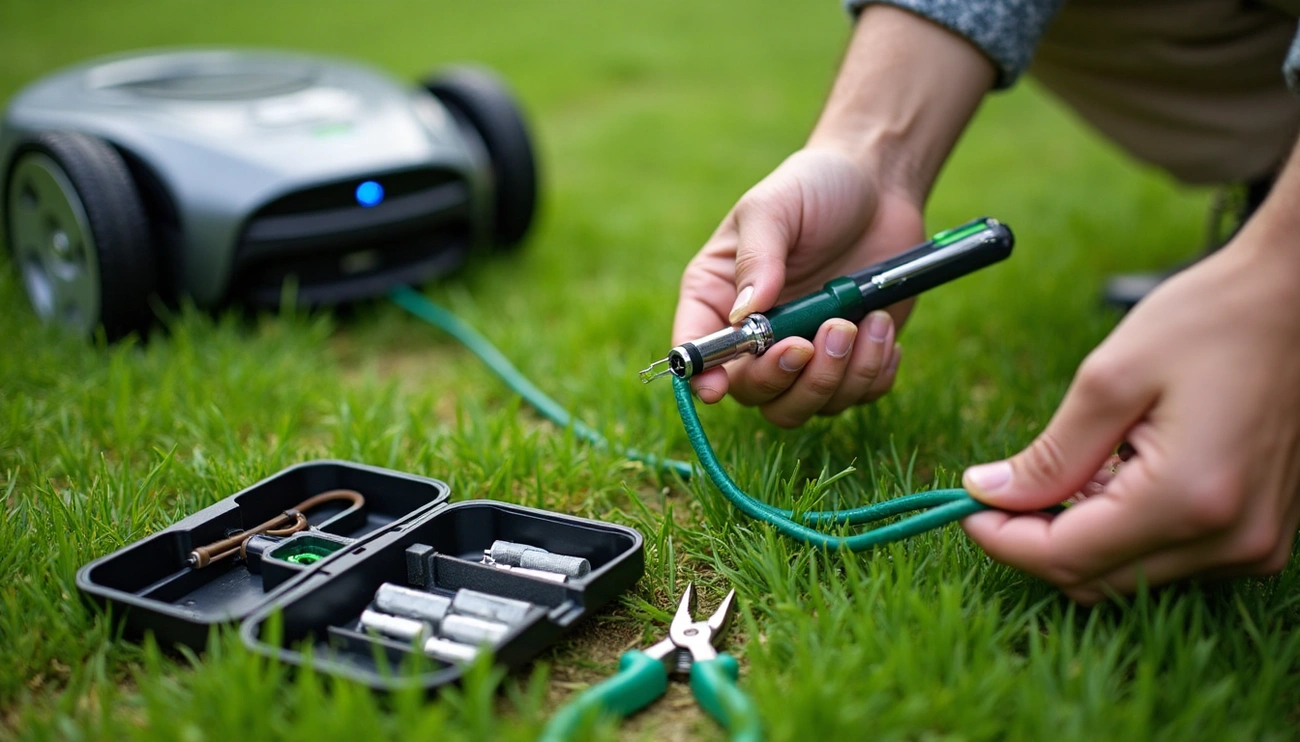
Using a loop wire break detector tool
A specialized loop wire break detector speeds up your search by a lot when you need to find boundary wire damage. These devices offer the quickest way to spot complete breaks in your robot mower’s boundary system.
How the tool works
Loop wire break detectors have two main parts: a transmitter and a receiver. The transmitter (tone generator) links to both ends of your boundary wire and sends different signals through each wire. It puts out a continuous low-frequency tone on one boundary wire and an intermittent higher-frequency tone on the other. You’ll hear these signals through the receiver as you walk around your yard.
The receiver shows one of two changes when you pass over a wire break:
- A continuous tone switches to an intermittent tone (or vice versa)
- The signal volume drops by a lot or vanishes completely
Most detector kits include a carrying case with both components and accessories you need for proper grounding. You should disconnect your boundary wires from the base station before connecting the transmitter’s clips to each wire end. Many systems need separate grounding wires linked to the transmitter’s ground terminals to work properly.
When to use it instead of the manual method
The wire break detector saves you lots of time during troubleshooting. Tasks that might take hours with manual methods often take just minutes with a detector. Some users say they find breaks in 5-10 minutes after they learn to use their tool.
The detector tool makes sense:
- Your boundary wire lies buried underground, where visual inspection isn’t possible
- You have large properties with extensive boundary wire systems
- Manual attempts haven’t found the break
Prices vary based on quality and features. Simple models start at $25, while professional-grade detectors like the Tempo 508S cost about $300. The money spent often pays off through time saved on multiple repairs.
Limitations with partial wire breaks
The sort of thing I love about these detectors is that they work great for complete wire breaks, but not partial breaks. Partial breaks happen when the wire’s insulation gets damaged, but the wire stays partly connected.
The signal still passes through the wire in these cases, though weakly. This makes it hard for the detector to find the problem spot. Many sources say partial breaks usually won’t trigger the loop light to go out. Your mower might correct itself in safe areas or fail to correct where it should.
A multimeter works better than a tone-based detector to measure your boundary loop’s resistance if you suspect partial breaks. High resistance readings (several thousand ohms) usually point to a partial break or poor connection.
Step-by-step guide to repairing the broken wire
A proper repair of your boundary wire break will keep your robot mower running reliably for years. The repair process becomes simple when you have the right tools and know the technique.
Trim damaged wire ends
Start by collecting your materials: waterproof cable connectors, side cutters, pliers, and spare boundary wire. You’ll need to trim about 60 centimeters (2 feet) from each end of the damaged wire to remove any compromised sections. Use wire cutters to make clean, straight cuts that ensure good connections. Remove larger sections to reach the undamaged wire if you notice corrosion or multiple small breaks.
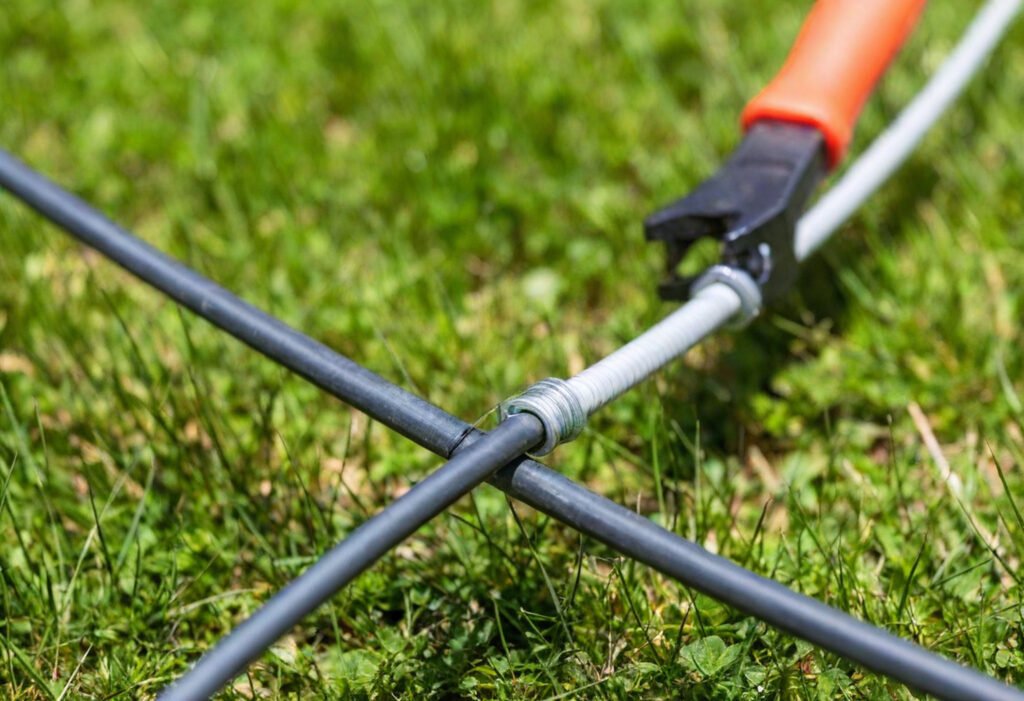
Insert wires into the waterproof coupler
The wires go directly into the waterproof coupler without stripping the insulation—each end into its own hole. Push each wire completely in until you can see it through the coupler’s transparent side. You’ll meet some resistance as you push the wires, but gentle pressure will get them through.
The cut cable ends might be too short to reach each other sometimes. You can solve this by adding a small piece of boundary wire between the original ends and connecting them with two separate couplers.
Press the coupler with pliers
After inserting both wires fully, press the coupler firmly with pliers. Husqvarna couplers need special attention—press the middle part first, then the sides. This crimping activates the internal gel that creates a waterproof seal and electrical contact. Test the connection by pulling gently on both wire ends to make sure they’re secure in the connector.
Secure or bury the repaired wire
The final step protects against future damage by burying the repaired section or securing it firmly to the ground. You can bury the wire by making a small channel in the turf with a screwdriver, placing the wire inside, and securing it with ground anchors. The grass will cover the repair in one to two weeks. For above-ground repairs, use wire staples to hold the section firmly in place and shield it from foot traffic or lawn equipment.
Conclusion
Fixing boundary wire breaks might seem tough at first, but the right knowledge makes this task manageable for any robot mower owner. This piece has explored two ways to track down these frustrating breaks. The manual method works well for visible wires and smaller properties. A specialized detector tool cuts down troubleshooting time substantially, especially with buried wires.
The warning signs of boundary wire problems are clear – from the “No loop signal” error to the flashing blue light on your charging station. These indicators help you spot issues before they turn into bigger problems.
The repair process stays simple once you find a break. You’ll need waterproof connectors and basic tools. Most homeowners can fix this without professional help, though patience helps during the detection phase.
Smart prevention reduces future breaks. You might want to bury wires deeper in high-traffic areas or add protection where you do landscaping work often. Quick checks of exposed wire sections will catch potential problems before they stop your mowing schedule.
Boundary wire problems are common with robot mowers, but they shouldn’t stop your automated lawn care for long. These systematic approaches will get your robotic helper back to work quickly. A bit of troubleshooting knowledge today saves hours of frustration tomorrow.